Objective 1.3 Modify slides, handouts, and notes
- 1.3.1 Modify slide masters and layouts
- 1.3.2 Modify default settings for notes pages
- 1.3.3 Modify default settings for handouts
1.3 Contents
1.3.1 Modify slide masters and layouts
When you create a new presentation, its slides assume the formatting of the presentation’s slide master, which controls the theme and base elements of all the slides.
|
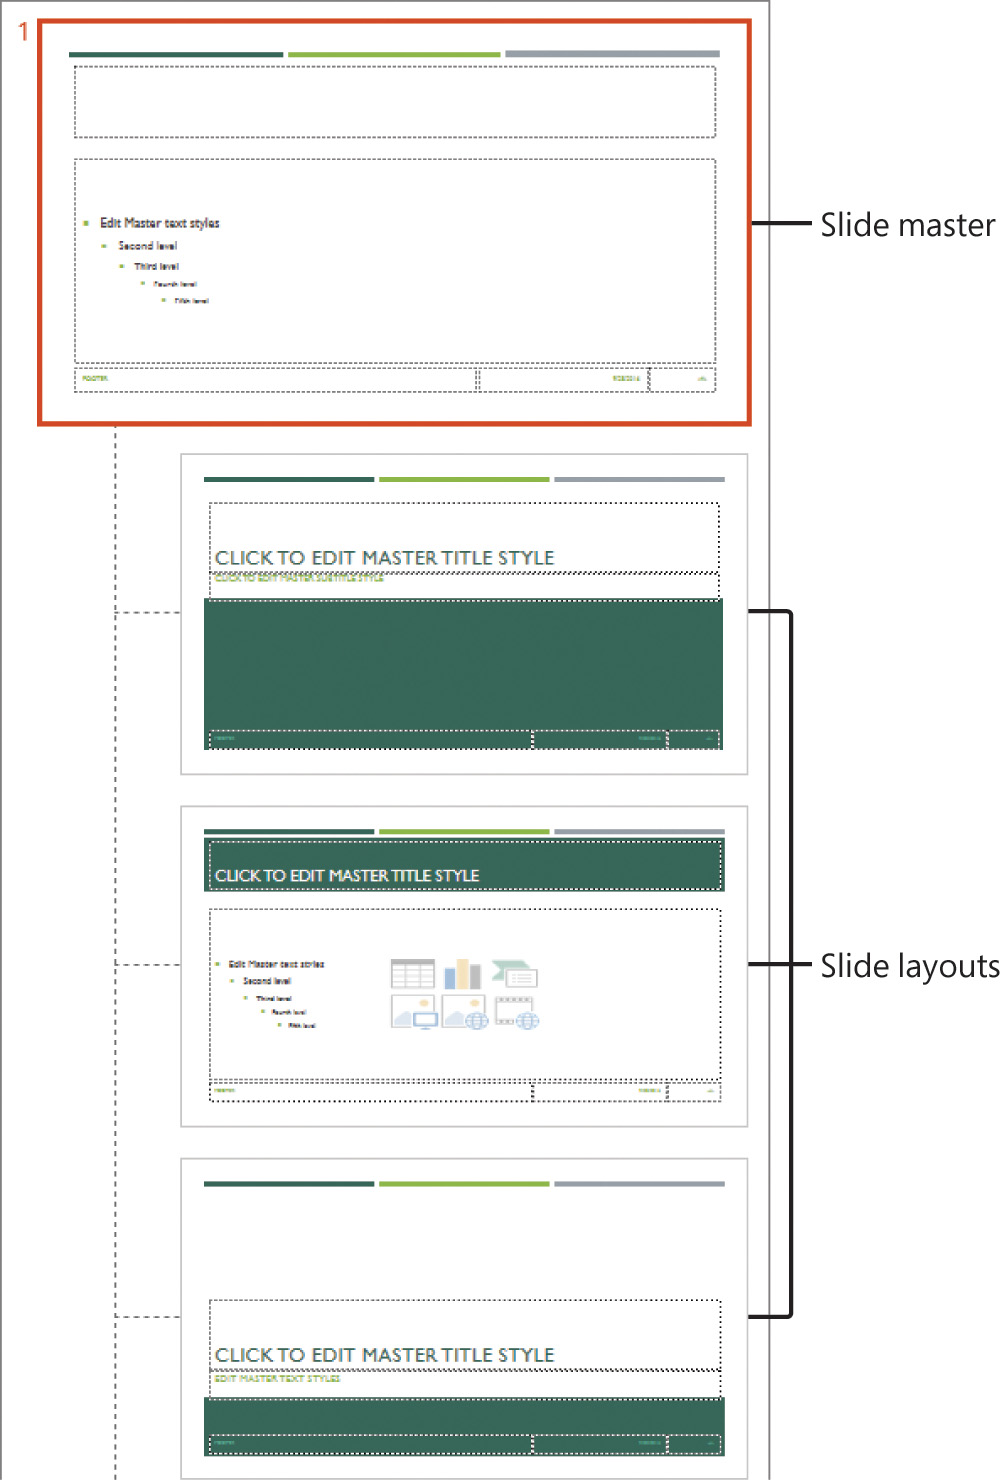
Each slide master is the base for multiple slide templates, called slide layouts, which host static content and content placeholders, and control the default formatting of content created within the placeholders. Typical slide layouts are Title, Title And Content, Two Content, Section Header, and Blank.
When working in a presentation, you can change some design elements directly on slides, but changes to the default settings of the presentation can be made only on the slide master and layouts. You can modify all the slides in a presentation by modifying the slide master on which all layouts are based, or you can modify one type of slide by modifying the layout applied to that slide.
|
Slide layouts are based on a slide master |
|
You work with slide masters in Slide Master view, which adds a Slide Master tab to the ribbon and hides the tabs that aren’t needed. In this view, the slide master thumbnail is displayed at the top of the Overview pane, followed by thumbnails of its associated layouts. From the Slide Master tool tab, you can modify elements of the slide master in the following ways:
Changes to the slide master are automatically applied to the connected layouts, and changes to the layouts are applied to the associated slides. |
Master elements are managed from the Slide Master tool tab |
Exam Strategy: Creating custom color sets, font sets, and themes are part of the objective domains for MOS Exam 77-726, “Word 2016 Expert: Creating Documents for Effective Communication” and MOS Exam 77-728, “Excel 2016 Expert: Interpreting Data for Insights.” MOS Exam 77-729, “PowerPoint 2016: Core Presentation Design and Delivery Skill” does not require you to demonstrate the ability to customize theme elements.
Tip: While working in Slide Master view, you can format text placeholders, insert graphic objects, and add animations and transitions by using the same techniques you would use to perform those tasks with slides.
To switch to Slide Master view
- On the View tab, in the Master Views group, click the Slide Master button.
Important: All the following procedures are performed in Slide Master view. You must switch to Slide Master view before you can follow the steps.
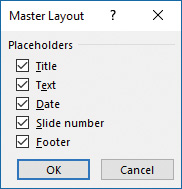
To specify the slide layout elements that are controlled by the slide master
|
These elements can be controlled by the master or delegated to the slide layouts |
To change the theme of the slide master and layouts
- Select the slide master or any associated slide layout.
- On the Slide Master tool tab, in the Edit Theme group, click the Themes button, and then click the thumbnail of the theme you want to apply to all slide layouts.
To configure the background image on a slide master or slide layout
- On the Slide Master tool tab, in the Background group, click Background Styles, and then click the background you want to apply to all slide layouts.
- In the Background group, click Background Styles, and then click Format Background. In the Format Background pane, configure the fill style, color, and transparency.
- To modify the background of the selected slide layout and all other slide layouts, configure the settings in the Format Background pane, and then click Apply to All.
- To remove the slide master background from a selected slide layout, in the Background group, select the Hide Background Graphics check box.
To insert an image on a slide master or slide layout
- Do either of the following:
- Select the slide master to display the image on all associated layouts.
- Select a slide layout to display the image only on slides with that layout.
- On the Insert tab, in the Images group, click Pictures.
- In the Insert Picture dialog box, browse to the folder containing the picture you want to insert, click the picture, and then click Insert.
- Move the image to the location you want. Then size and format the picture by using the commands on the Format tool tab.
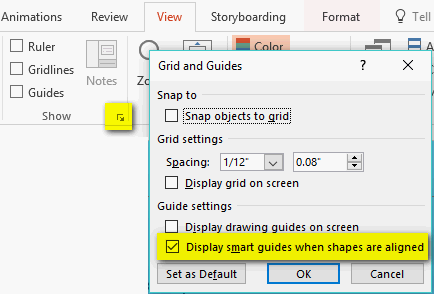
Tip: Use the on-screen guides to align the image with other slide elements. To display the smart guides: View tab, Show group > Grid Settings dialog box > Display smart guides when shapes are aligned check box. 
To add a slide layout to a slide master
- On the Slide Master tool tab, in the Edit Master group, click Insert Layout.
- Right-click an existing slide layout, and then click Insert Layout.
- To duplicate an existing slide layout, right-click the slide layout, and then click Duplicate Layout.
To display the name and usage of a slide layout
|
Useful information about a slide layout |
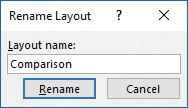
To rename a slide layout
|
Slide layout names can reflect their content or purpose |
To remove one or more layouts from a slide master
- In the Slides pane, select the slide layout or layouts you want to remove.
- Do one of the following:
- Press the Delete key.
- Right-click the selection, and then click Delete Layout.
- On the Slide Master tool tab, in the Edit Master group, click the Delete button.
Tip: Only slide layouts that are not currently in use can be deleted. If a slide layout is applied to one or more slides, the Delete Layout command and the Delete button are unavailable.
To insert content placeholders on a slide layout
- In the Master Layout group, click the Insert Placeholder arrow, and then click Content, Text, Picture, Chart, Table, SmartArt, Media, or Online Image.
- Click the slide to insert a placeholder of the default size and shape, or drag to draw a placeholder of a specific size.
- Change the size, location, outline, or fill of the placeholder by using the tools on the Format tool tab.
To modify placeholders on a slide master or layout
- Select a placeholder, and then change its size, location, outline, or fill by using the tools on the Format tool tab.
- Select the placeholder content, and then change its font, size, style, effect, and alignment by using commands on the Home tab.
To modify a slide layout independent of the slide master
- On the Slide Master tool tab, in the Master Layout group, select or clear the Title and Footers check boxes to specify whether the slide master sets these elements for the slide master.
- In the Master Layout group, from the Insert Placeholder list, insert the elements for which you want to configure space on the slide layout.
To close Slide Master view
- On the Slide Master tool tab, in the Close group, click Close Master View.
- On the View tab, in the Presentation Views or Master Views group, click any other view.
- On the View Shortcuts toolbar at the right end of the status bar, click any view button.


