Objective 1.5 Change presentation options and views
- 1.5.1. Display different views of a presentation
- 1.5.2. Display and edit presentation properties
- 1.5.3 Change slide size
1.5 Contents
1.5.3. Change slide size
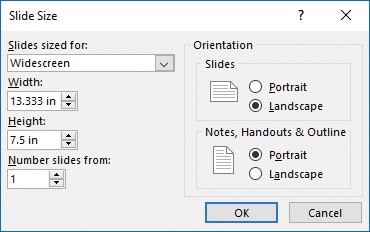
By default, PowerPoint 2016 slides are sized for a widescreen display (13.333 inches by 7.5 inches). The slides are oriented horizontally, with slide numbers starting at 1. You can set the size and orientation of the slides, and the orientation of notes, handouts, and outlines, to fit your intended distribution methods. You modify these attributes in the Slide Size dialog box.

The Slide Size dialog box
Exam Strategy: Exam 77-729, “PowerPoint 2016: Core Presentation Design and Delivery Skills,” requires you to demonstrate the ability to change among standard and custom slide sizes. Changing the orientation of slides and printed collateral is not part of the exam objective domain.
You can select from the following slide sizes:
- On-screen Show For an electronic slide show on screens of various aspects (4:3, 16:9, or 16:10)
- Letter Paper For a presentation printed on 8.5-by-11-inch US letter-size paper
- Ledger Paper For a presentation printed on 11-by-17-inch ledger-size paper
- A3 Paper, A4 Paper, B4 (ISO) Paper, B5 (ISO) Paper For a presentation printed on paper of various standard international sizes
- 35mm Slides For 35mm slides to be used in a carousel with a projector
- Overhead For transparencies for an overhead projector
- Banner For a webpage banner
- Widescreen For a widescreen monitor display
- Custom For slides that are a nonstandard size
Tip: The Custom setting is particularly useful if you use PowerPoint to create something other than slide presentation. For example, you can lay out the art elements for postcards, brochures, and posters on custom-sized PowerPoint slides, and save the slides as PDF files to print.
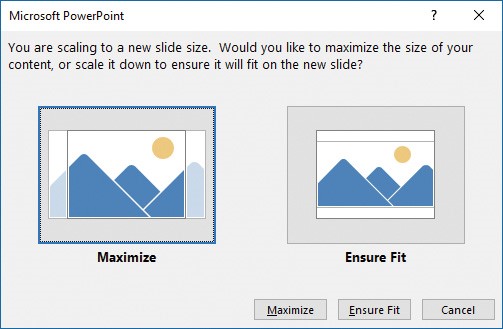
Each presentation has only one slide size—a presentation can’t contain slides of different sizes. Changing the slide size of a presentation can affect the appearance of slide content, particularly when the slide height or width decreases. Accordingly, you have two options for the scaling of existing content: Maximize and Ensure Fit.

The Ensure Fit option scales all slide content to fit the slide
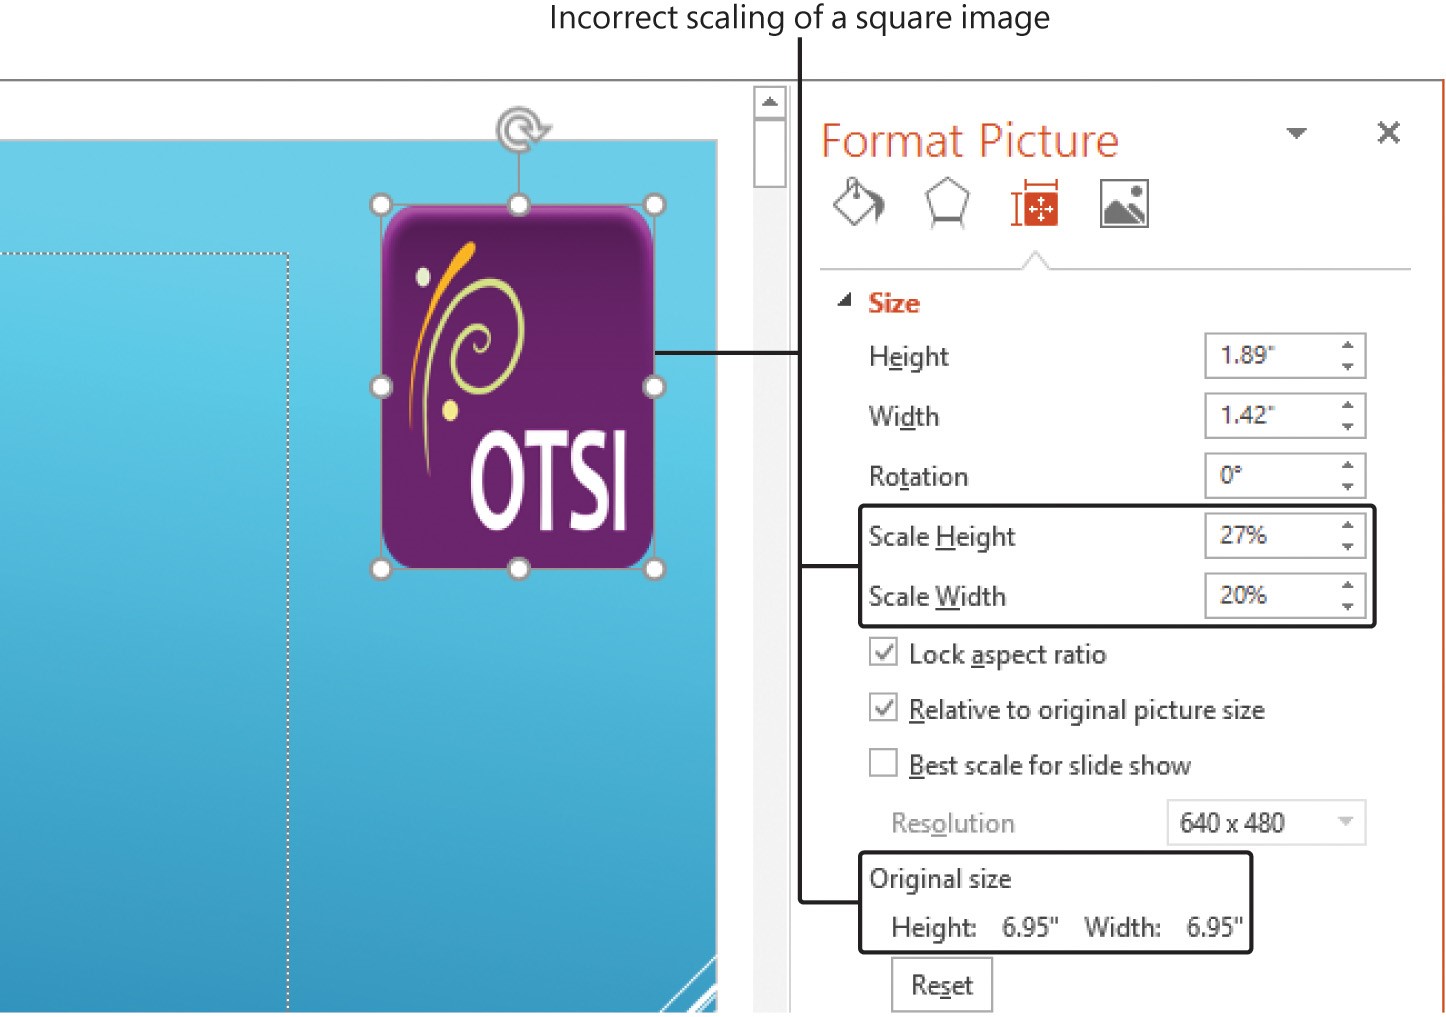
The scaling options gracefully handle text and image content on the slides, but images, shapes, or other objects located on the slide masters can become skewed. It’s important to review slide content after changing the slide size so you can address any content that didn’t maintain its aspect ratio (the height-to-width relationship) when it was scaled. You might need to manually rescale images that are part of the slide master.
To change the slide size of a presentation
- On the Design tab, in the Customize group, click the Slide Size button, and then do either of the following:
- On the Slide Size menu, click Standard (4:3) or Widescreen (16:9).
- On the Slide Size menu, click Custom Slide Size. In the Slide Size dialog box, do either of the following, and then click OK:
- In the Slides sized for list, select the size you want.
- In the Slides sized for list, click Custom. Then in the Width and Height boxes, specify the slide dimensions you want.
- In the Microsoft PowerPoint dialog box that opens, click Maximize to ensure that no blank space is added to the slide, or Ensure Fit to ensure that all existing content fits on the slide.
To manually rescale an image or object on a slide master
|
Slide scaling can affect the aspect ratio of slide master images |
