Objective 1.2: Prepare Documents For Review
- 1.2.1 Restrict editing.
- 1.2.2 Mark a document as final.
- 1.2.3 Protect a document with a password.
OBJECTIVE 1.2: Contents
1.2.2 Mark a document as final.
Marking a document as final
As a step in completing a document you have worked on with a group, you can mark the document as final so that colleagues or coworkers know the document’s status. Marking a document as final provides a notification of its status; it does not prevent users from making changes (users can turn off the feature), and it does not provide the same level of protection as applying a password to the document.
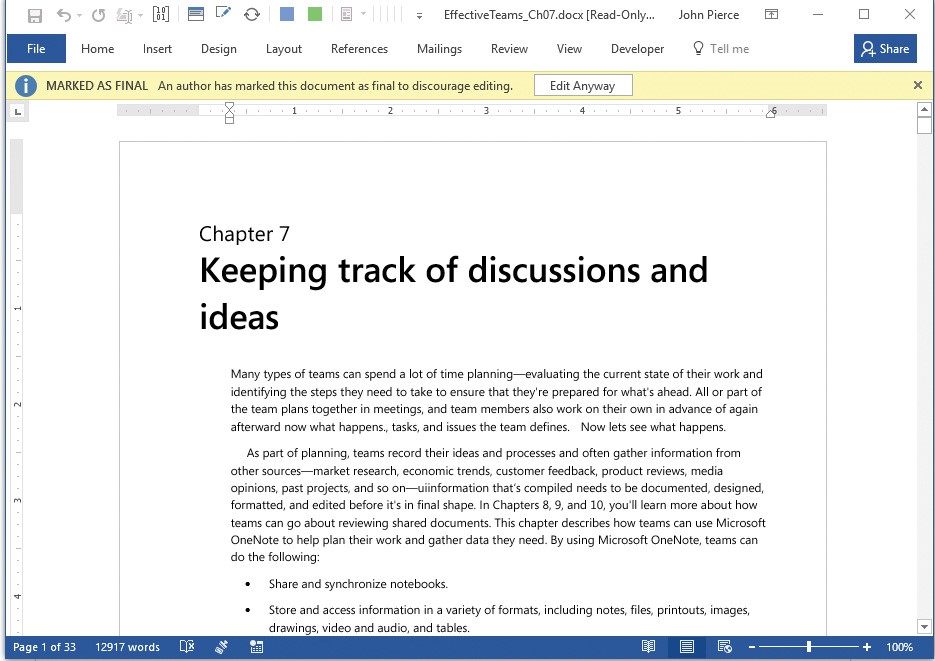
When a user opens a document that is marked final, Word displays the message bar, notifying the user of the document’s status. In addition, the title bar of the document window indicates that the file’s status is read-only.

A user must intentionally activate the document to make changes
To mark a document as final
1. On the Info page of the Backstage view, click Protect Document, and then click Mark as Final.
2. Click OK to confirm the operation and save the document.
Tip: Word might display a message box describing the effects of marking a document as final. Select the Do Not Show Again check box if you no longer need Word to display this message, and then click OK.